Custom Doctests
The extension supports a few limited parameters to configure the running
shell. These parameters are exposed as reStructured text options to the
.. ipython directive, decorators for the source code directly, and
configurable options that are given directly to Sphinx in a projects conf.py.
Testing directive outputs
For example, you can put comments in your IPython sessions, which are
reported verbatim. There are some handy “pseudo-decorators” that let you
wrap a function with @doctest and utilize the doctest module on
the output.
The inputs are fed to an embedded IPython session and the outputs are inserted into your documentation automatically.
If the output in your doc and the output from the embedded shell don’t
match on a doctest assertion, an error will occur.
If the @doctest decorator is found, it will take these steps when your
documentation is built:
Execute the input lines in your IPython directive block.
Compare the output of this with the output text that you’ve put in the IPython directive block (I.E. what comes after
Out[NN]);If there is a difference, the embedded shell will raise an error and halt building the documentation.
You can @doctest multi-line output as well. Just be careful
when using non-deterministic inputs like random numbers in the IPython
directive.
Because your inputs are run through a live interpreter, the random numbers that are generated on the fly will likely differ from run to run.
Therefore the output IPython will compare the present run to will likely differ, raising errors and causing mayhem.
How can we avoid this?
Here we “seed” the random number generator for deterministic output, and we suppress the seed line so it doesn’t show up in the rendered output.:
In [1]: import numpy
For more information on @suppress and @doctest decorators, please refer
to the end of this file in Pseudo-Decorators section.
Registering Your Own Doctest Handlers
The Sphinx extension that provides support for embedded IPython code provides
a pseudo-decorator @doctest, which treats the input/output block as a
doctest, raising a RuntimeError during doc generation if
the actual output (after running the input) does not match the expected output.
An example usage is:
.. ipython::

     In [1]: x = 1

     @doctest
     In [2]: x + 2
     Out[3]: 3
One can also provide arguments to the decorator. The first argument should be the name of a custom handler. The specification of any other arguments is determined by the handler. For example,
.. ipython::

   @doctest float
   In [154]: 0.1 + 0.2
   Out[154]: 0.3
allows the actual output 0.30000000000000004 to match the expected output
due to a comparison with numpy.allclose.
This is detailed in the module IPython.sphinxext.custom_doctests.
This module contains handlers for the @doctest pseudo-decorator. Handlers
should have the following function signature:
-
handler(sphinx_shell, args, input_lines, found, submitted)¶ Modify the
doctestand the document state.- Parameters
sphinx_shell – the embedded Sphinx shell
args (list) – contains the list of arguments that follow: ‘@doctest handler_name’
input_lines (list) – contains a list of the lines relevant to the current doctest
found (str) – is a string containing the output from the IPython shell
submitted (str) – is a string containing the expected output from the IPython shell.
Handlers must be registered in the doctests dict at the end of the
custom_doctests module.
-
doctests¶ Dict that maps handlers to the name that invokes them in rst docs. The key represents the first argument that must be given to
@doctestin order to activate the handler.
Todo
doctest handlers
I quite honestly don’t know how you’re supposed to add handlers to the dict though.
But here’s the sauce:
# dict of allowable doctest handlers. The key represents the first argument
# that must be given to @doctest in order to activate the handler.
doctests = {
    'float': float_doctest,
}
Multi-Line Input and Output
Another demonstration of multi-line input and output.:
In [2]: print(x)
jdh

In [3]: for i in range(10):
   ...:     print(i)
   ...:
   ...:
0
1
2
3
4
5
6
7
8
9
Most of the “pseudo-decorators” can be used as options to IPython
mode. For example, to setup matplotlib’s pylab but suppress the
output, you can set things up in the following way.
When using the matplotlib use directive, it should
occur before any import of pylab. This will not show up in the
rendered docs, but the commands will be executed in the embedded
interpreter and subsequent line numbers will be incremented to reflect
the inputs:
.. ipython::
   :suppress:

   In [144]: from matplotlib.pylab import *
   In [145]: ion()
Likewise, you can set :doctest: or :verbatim: to apply these
settings to the entire block. For example,
In [4]: cd mpl/examples/
/home/jdhunter/mpl/examples

In [5]: pwd
Out[5]: '/home/jdhunter/mpl/examples'

In [6]: cd mpl/examples/<TAB>
mpl/examples/animation/        mpl/examples/misc/
mpl/examples/api/              mpl/examples/mplot3d/
mpl/examples/axes_grid/        mpl/examples/pylab_examples/
mpl/examples/event_handling/   mpl/examples/widgets

In [7]: cd mpl/examples/widgets/
/home/msierig/mpl/examples/widgets

In [8]: !wc *
    2    12    77 README.txt
   40    97   884 buttons.py
   26    90   712 check_buttons.py
   19    52   416 cursor.py
  180   404  4882 menu.py
   16    45   337 multicursor.py
   36   106   916 radio_buttons.py
   48   226  2082 rectangle_selector.py
   43   118  1063 slider_demo.py
   40   124  1088 span_selector.py
  450  1274 12457 total
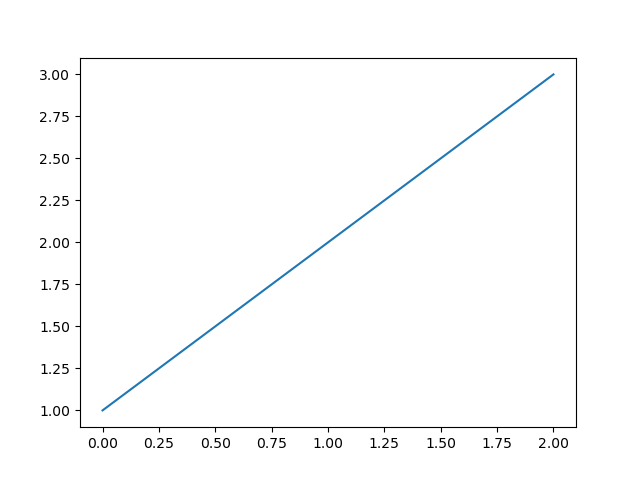
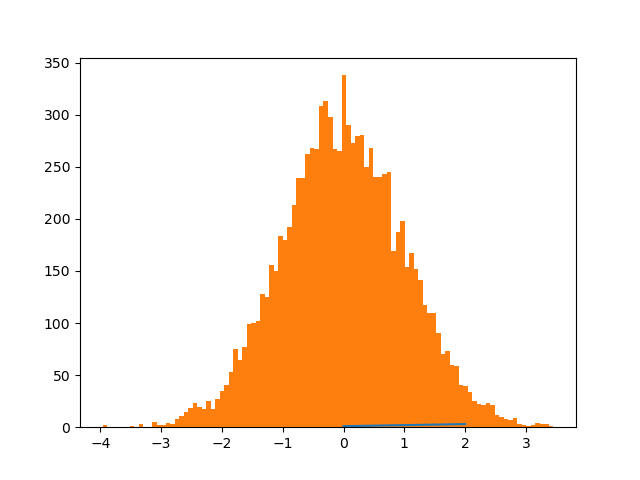
You can create one or more pyplot plots and insert them with the
@savefig` decorator.
For more information on @savefig decorator, please refer to the end of this
page in Pseudo-Decorators section.
In [9]: plot([1,2,3]);

# use a semicolon to suppress the output
In [10]: hist(np.random.randn(10000), 100);


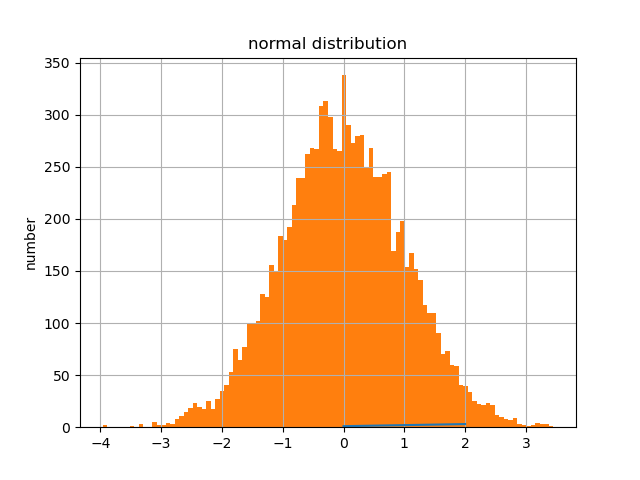
In a subsequent session, we can update the current figure with some text, and then resave.:
In [11]: ylabel('number')
Out[11]: Text(38.097222222222214, 0.5, 'number')

In [12]: title('normal distribution')
Out[12]: Text(0.5, 1.0, 'normal distribution')

In [13]: grid(True)

You can also have function definitions included in the source.
In [14]: def square(x):
   ....:     """
   ....:     An overcomplicated square function as an example.
   ....:     """
   ....:     if x < 0:
   ....:         x = abs(x)
   ....:     y = x * x
   ....:     return y
   ....:
Then call it from a subsequent section.
In [15]: square(3)
Out[15]: 9